Treasure Coast Circuit
3.2 MILES
The Treasure Coast Circuit, which includes three configurations, will be open to race teams, track day drivers, manufacturers, and driving schools, while also playing host to special P1 member days. The circuit will provide a versatile track layout suitable for a range of motorsports disciplines, and will prioritize safety, accessibility, and spectator experience.
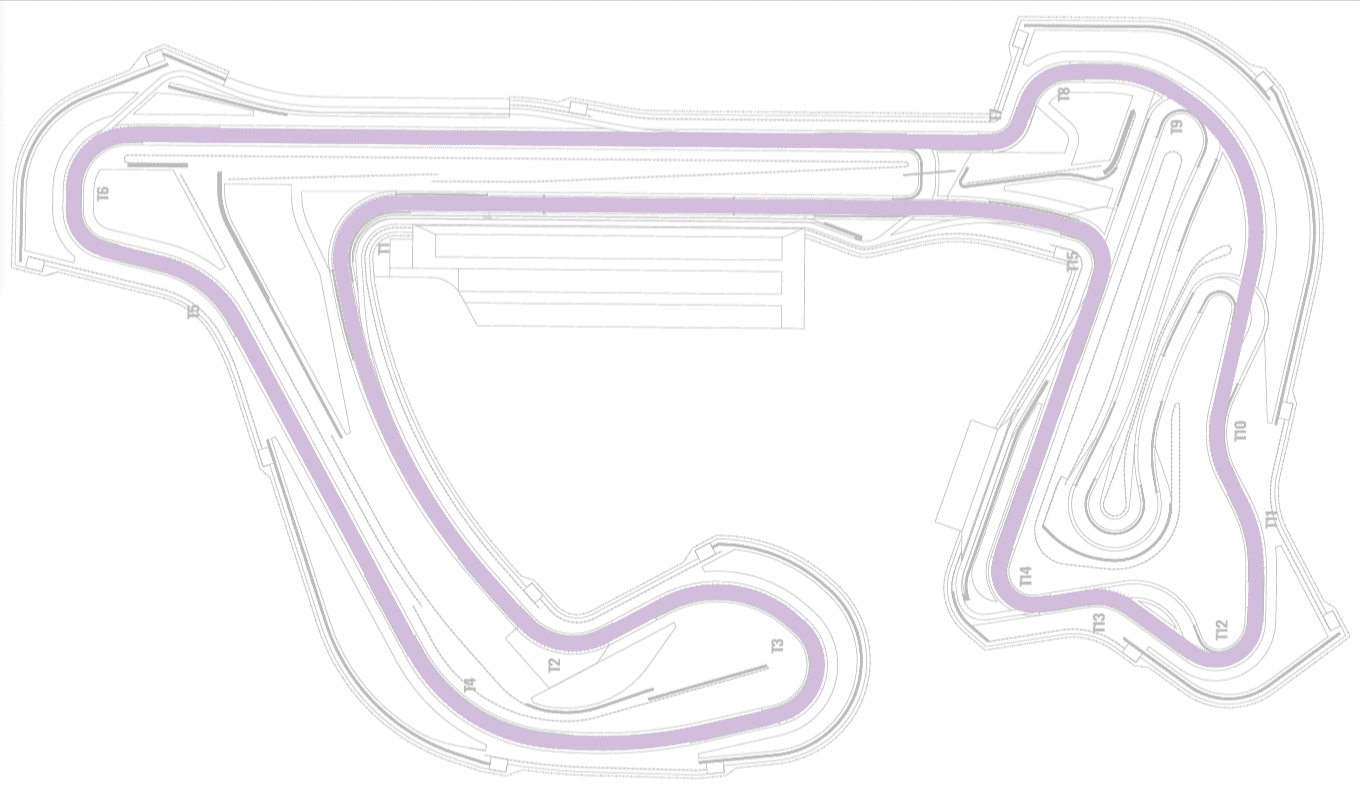
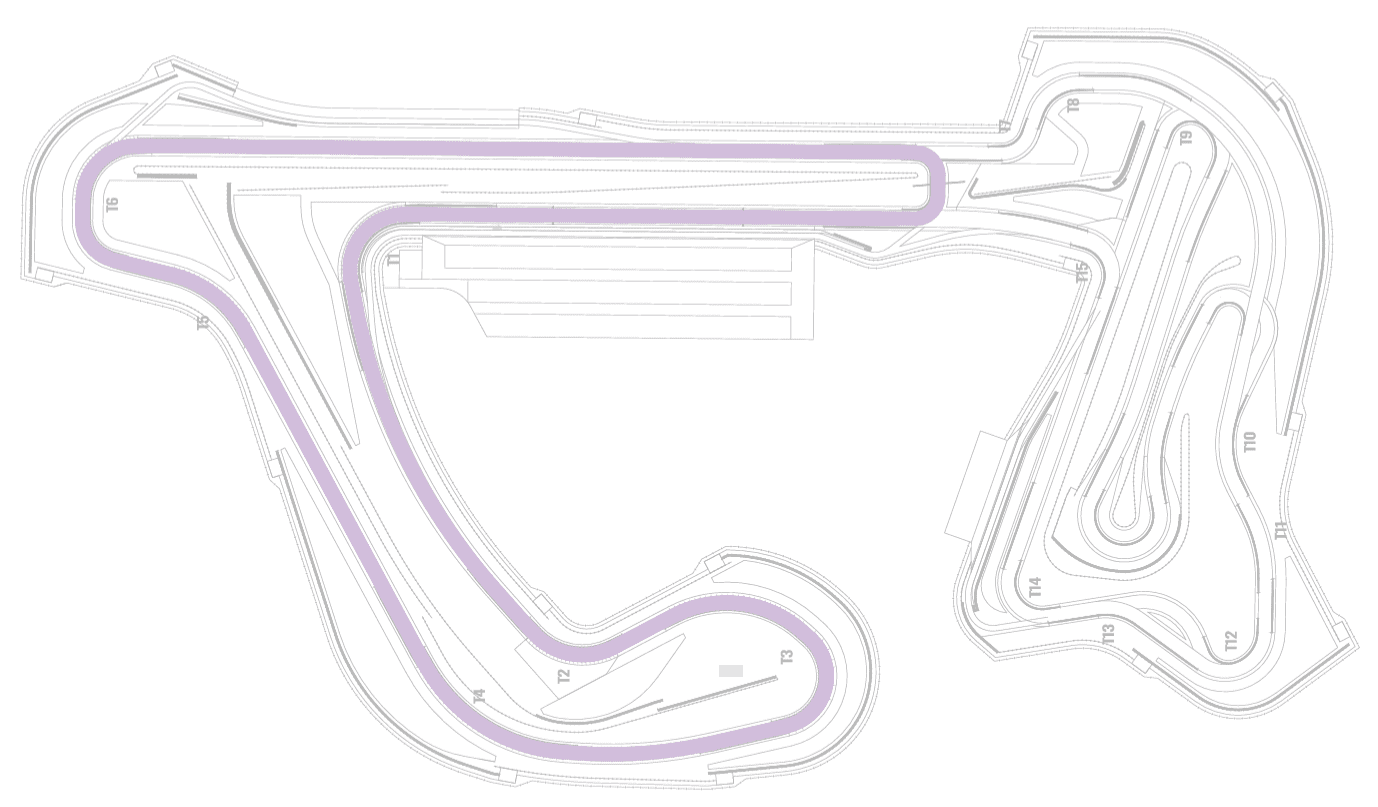
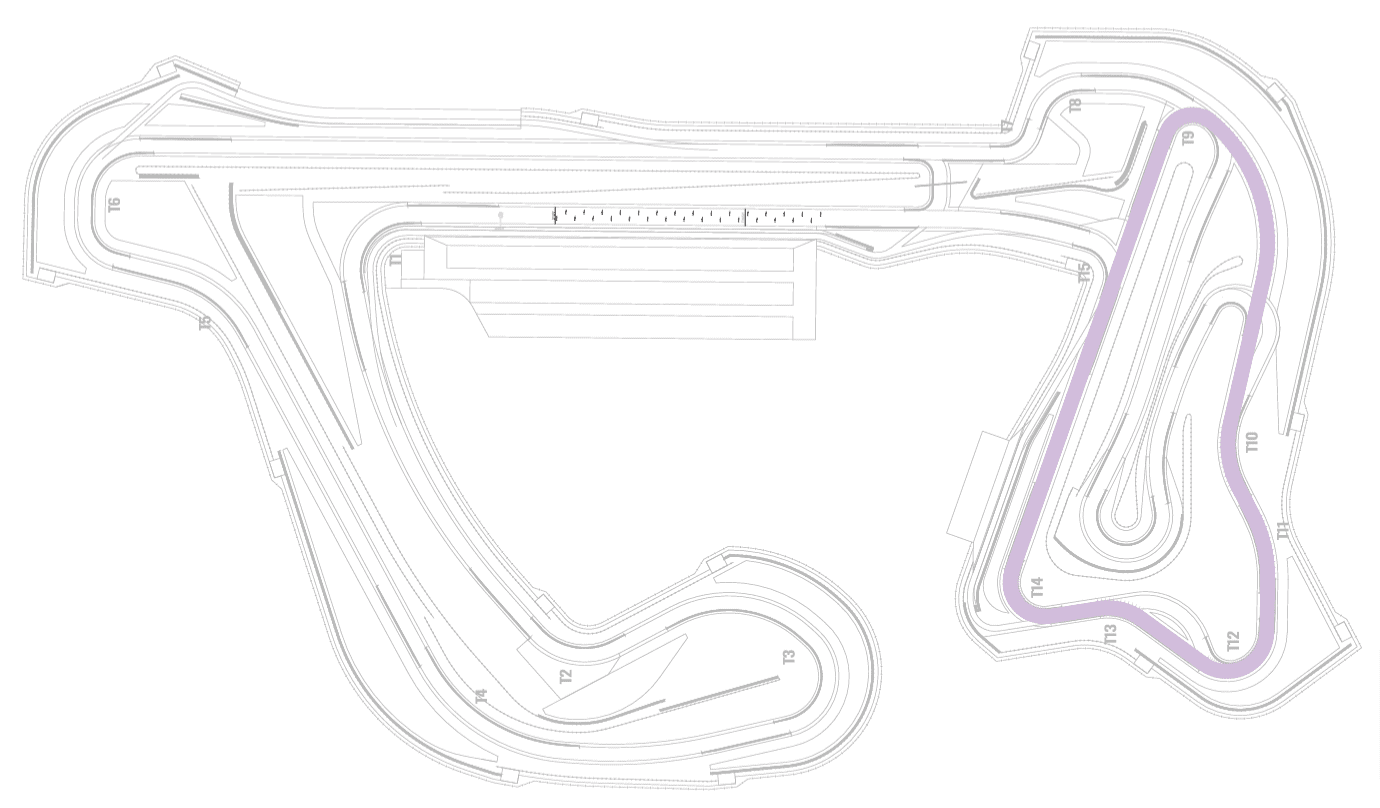
The design of the circuit includes a number of configurations for increased versatility. In addition to the Full Course configuration, the track can be split for simultaneous operation. The two configurations that result have been called the North configuration and the South configuration.
- South Configuration: A short 0.8-mile track with a brief start-finish straight, a big brake into T1, and a mid-speed sequence with a subtle elevation change; also has additional drift links and a corner sequence that has taken inspiration from the world-famous Nürburgring carousel
- North Configuration: Combines longer straights and faster, more technical corner sequencing to take a driver from novice to intermediate; ups the speeds from the South configuration, introducing late apex corners, curved braking zones, and blind crests
- Full Course Configuration: Includes a fast-approach blind apex and a fast-approach, high-banked corner with two complex sequences that no amount of time spent on the North or South configurations can teach
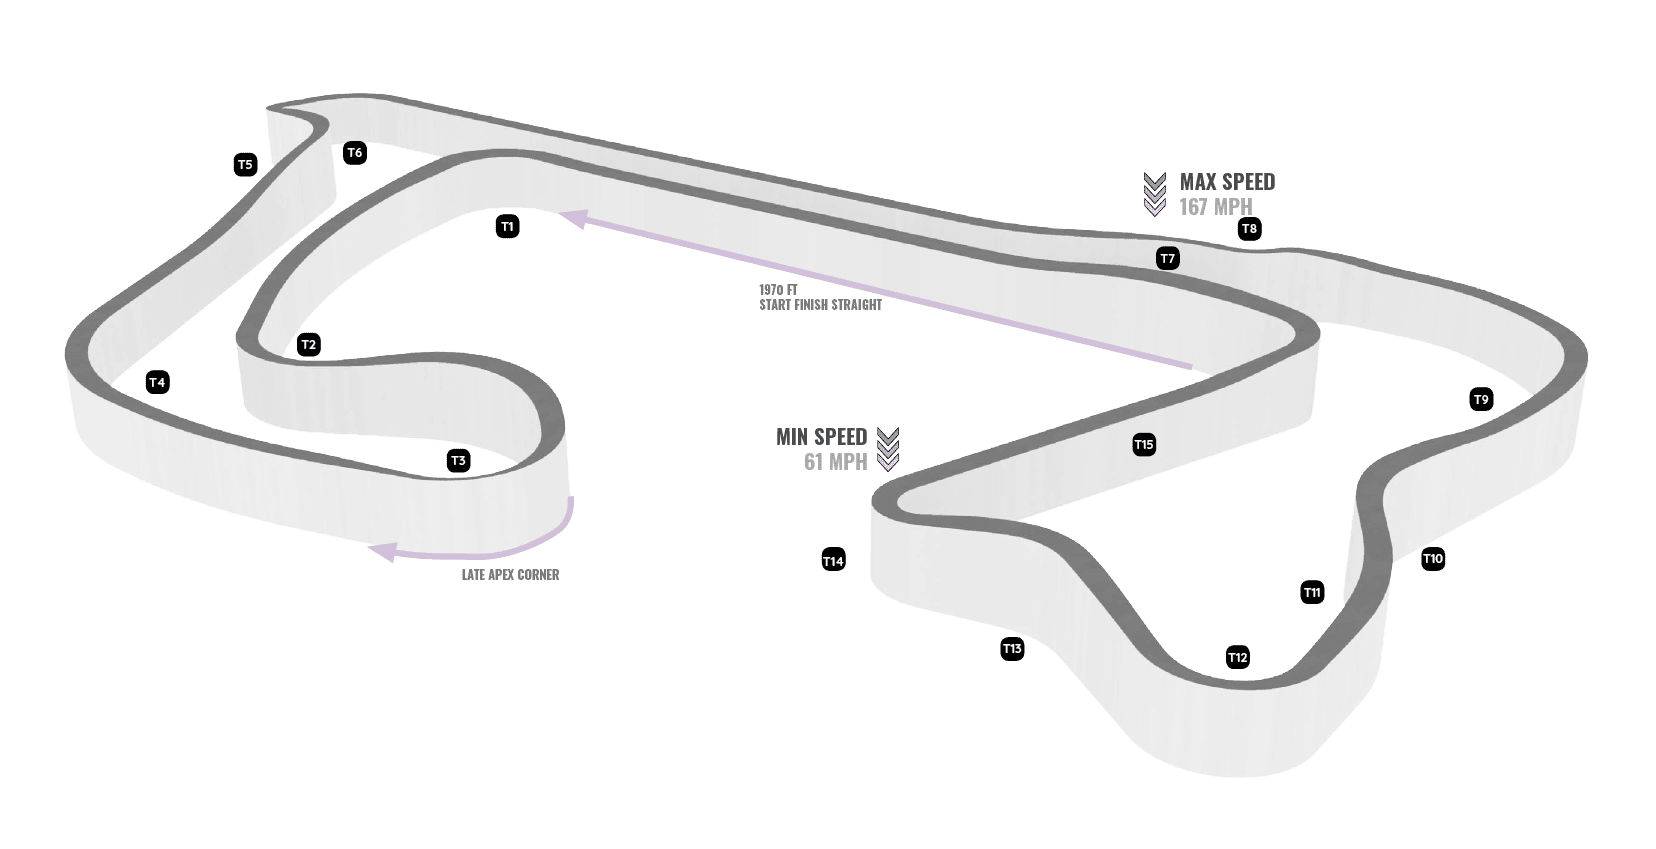
Tour the Treasure Coast Full Course Configuration

1
SEQUENCE 1 (Starting Grid)SEQUENCE 1 (Starting Grid)
A level grid and start line provides drivers with a professional starting experience where they can concentrate on the lights rather than working about rolling forward or backward on the grid.
2
SEQUENCE 2 (T1-T3)SEQUENCE 2 (T1-T3)
Once the lights go out, the run to T1 is short at just over 300ft (90m) to ensure that the speeds are not too high on approach to T1 on the first lap. T1 incorporates increased corner banking to provide additional grip on corner exit, which will allow for drivers to steadily increase apex speeds.
The run to T2 is a long gentle left-hand turn, allowing drivers to use full throttle. On the exit from T2, the track begins to climb toward the first apex of the double late apex turn of T3.
As T3 starts to tighten, the track elevation drops away as the track camber increases. The changing elevation, camber, and corner radius creates a very technical sequence that will quickly become very rewarding.
3
SEQUENCE 3 (T4-T6)SEQUENCE 3 (T4-T6)
While T3 is a challenge for even a very competent driver, the reward, when taken correctly, is huge as the speed environment is maintained all the way to the braking event for T6. T4 is completely flat out, but pushes drivers to the track left, adding slightly to the T5 and T6 sequence.
T5 and T6 combine a number of challenges to produce a sequence that is sure to spark conversation in the paddock and, while it will not be easy to remember on approach to T5, the T6 exit speed will provide an advantage for full 1/2 mile (800m) back straight. This sequence begins with a blind crest before T5, which encourages drivers to brake early. To extract the most from the sequence, drivers will need to turn in and stay as tight as possible to the left on the exit from T5. By staying to the left, T6 is effectively made larger, allowing drivers to carry more speed around the double apex of T6 and onto the back straight.
4
SEQUENCE 4 (T7-T10)SEQUENCE 4 (T7-T10)
Due to the complexity of the T5 and T6 sequence, we expect to see large speed differentials along the back straight which, in turn, will generate overtaking opportunities far before the fastest section of the circuit and the hard, uphill braking event into which T7 follows. T7 and T8 is a low-speed chicane, which should allow a driver who has managed to secure an overtake on the back straight to defend from being immediately re-overtaken.
Once through the chicane, T8 quickly blends into T9, which becomes a full throttle sequence as the track opens up as the driver's speed increases. This sequence is designed to be medium speed where car positioning is key. While T9 shouldn’t be a grip-limited corner, drivers will still have to remember to stick tight to the right side of the track to provide as many options as possible through the T10 and T11 open sequence.
T10 combines medium- to high-speed with a gentle crest placed at the apex of T10, combining speed with a mix of vertical and lateral G to create an all around thrilling experience.
5
SEQUENCE 5 (T11-T14)SEQUENCE 5 (T11-T14)
The final sequence of the Treasure Coast Circuit is a medium- to low-speed set of corners where running deep on any of the corners can cause a knock-on effect to the corners that follow. T12 to T14 incorporates a mid-corner sag and increased circuit banking to maximize grip, a mid-corner crest and low-circuit banking to minimize grip, and, finally, a downhill brake event to really test a driver's handling abilities.
The 850ft (260m) run to the final corner is short, but will be enough to get around someone who may be struggling through the T12-T14 sequence. T14 has been designed to be as forgiving as possible, with an uphill approach to enhance braking, a corner banking which increases to pass the corner apex for increased grip, and finally a downhill exit to enhance acceleration out of a corner. No matter how the rest of your lap has gone, Treasure Coast is sure to leave you feeling like a hero as you go past the pit wall.
Course Configurations
| Treasure Coast Full Course | Treasure Coast North | Treasure Coast South | |
|---|---|---|---|
| DESIGN STANDARDS* | FIA Grade 3 | FIA Grade 3 | N/A |
| TRACK LENGTH | 2.8 miles | 1.7 miles | 0.7 miles |
| AVERAGE SPEED** | 112 mph | 111 mph | 95 mph |
| MAX SPEED** | 167 mph | 165 mph | 144 mph |
| LAP TIME** | 1 min 27 sec | 59 sec | 28 sec |
| LONGEST STRAIGHT | 1,970 ft | 1,480 ft | 1,310 ft |
| TOTAL LENGTH OF STRAIGHTS | 8,700 ft | ||
| CORNERS | 15 | 12 | 5 |
| FEATURES | Late Apex Corner | Blind Entry Chicane | Late Apex Corner | Banked Final Turn | Hard T1 Brake | Mid Speed Corner Sequence |
| SUPPORT INFRASTRUCTURE | Primary Competition Paddock | Non-competition Paddock | Direct Connection to P1 Members Paddock | Primary Competition Paddock | Direct Connection to P1 Members Paddock | Non-competition Paddock | Drift and Carousel Links |
*Circuits designed to specific FIA standards; FIA homologation not complete | **Based on F2 racecar simulation


